How I Leaped Forward My Jenkins Build with JFrog Pipelines
Jenkins is the most popular open source CI tool on the market today. Being an early entry into the marketplace, Jenkins popularized CI. Like other CI tools Jenkins empowers developers to automatically build, integrate, and test code as soon as they commit it to the source repository. This allows developers to catch bugs quickly and ultimately deploy much faster.
Now, over ten years after its initial release, Jenkins is at a crossroads. For a large segment of the Jenkins community, it has become the tool they ‘tolerate’. The term ‘Jenkins sprawl’ has become a common part of the IT vernacular. Jenkins hits a complexity wall when a large number of plugins are used and these plugins start colliding with each other. One way to get out of this ‘plugin hell’ is to spread the workload (and the plugins) over a larger number of servers and instances. As development teams add more instances of Jenkins, they face challenges managing the siloed Jenkins configurations that proliferate. Unfortunately you just end up trading in one type of complexity for another. Also, Jenkins was built for the pre-container and pre-microservices era. For any tool to maintain its value, it has to align well with these broader technology trends.
In this blog post I’ll cover different ways to accelerate and improve your CI/CD DevOps flow, with JFrog Pipelines as part of your SDLC.
JFrog Pipelines is an automation solution for building, testing, and deploying your software. It provides end-to-end orchestration and optimization of all key processes of your DevOps pipeline, including the following strengths:
- Pipelines isn’t just a standalone CI/CD solution, it’s part of the JFrog Platform, with Artifactory and your binaries at its heart
- Plugin free architecture – we all know how cumbersome it is to maintain our plugins…
- Quick and Simple Pipeline Configuration with Native steps
- Centralized service (compared to “Jenkins sprawl”) that scales to infinity
- YAML syntax – easy to learn
- Built-in security vulnerability scanning and license compliance with JFrog Xray
As a Solution Engineer at JFrog, here are some questions and concerns that I frequently get from customers onboarding our Enterprise+ offering. Specifically on how to tackle the migration process of their Jenkins environment to JFrog Pipelines.
- Why should we risk our deployment by changing processes that work?
- Migrating all of our CI/CD processes to JFrog Pipelines will take an enormous amount of time!
- We have plugins for everything with Jenkins! Are we going to have the same support with JFrog?
Jenkins Pipeline Example
I’ll be using the below end-to-end Kubernetes CI/CD Jenkins pipeline baseline example, to show how and why using JFrog Pipelines can work for you. This pipeline builds the publicly known pet-clinic Maven project, containerizes it using Docker, and deploys the created image to a K8s cluster environment using a Helm chart. It includes the following steps:
Continuous Integration (CI)
- Builds a Maven Project (Pet Clinic Spring Application) and Deploys the outcome binaries to Artifactory.
- Containerizes the new application with Docker, and deploys the new image to Artifactory.
Continuous Deployment (CD)
- Installs Helm, package manager for k8s.
- Deploys the image hosting our application to the production k8s based environment, using a Helm Chart available in Artifactory.
Code sample for the above pipelines (Jenkinsfile & Dockerfile) is available here.
Let’s take a look at possible techniques we can implement for this very common CI/CD example.
Leap Forward with JFrog Pipelines
There are three basic techniques you can choose from to kickstart JFrog Pipelines. The first two achieve integration with Jenkins and can be done in any order, or you can opt for just one of these two integration approaches. Once you’ve integrated Jenkins with JFrog Pipelines, you can proceed with #3 and focus all your future investments in JFrog Pipelines:
- Trigger Pipelines (CD) from Jenkins (CI) using Incoming Webhooks – a 1st class citizen in JFrog Pipelines.
- Migrating parts of your SDLC is the way to go; Trigger your Jenkins (CD) from JFrog Pipelines (CI) with Jenkins Integration.
Add more automation for streamlining your processes – design your new CI/CD processes with JFrog Pipelines.
1. Webhooks are 1st class citizen in JFrog Pipelines
One way to go is to preserve and maintain the CI in Jenkins, but perform the actual deployment with JFrog Pipelines.
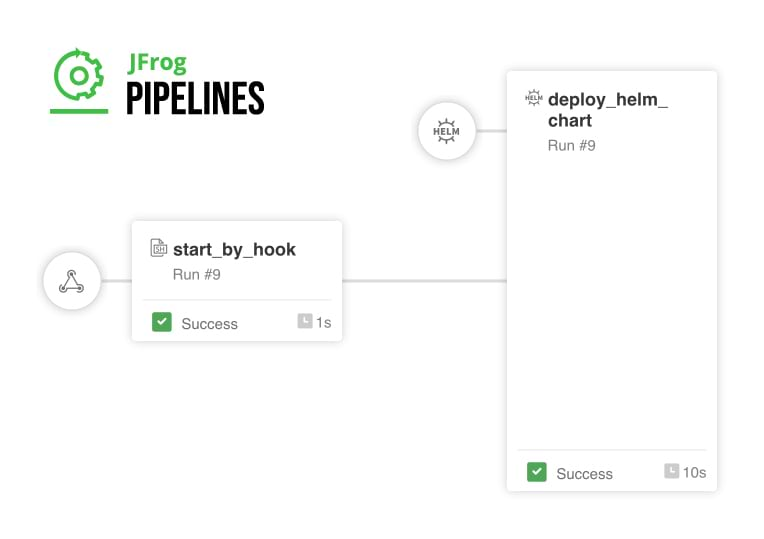
Linking JFrog Pipelines with Jenkins is possible using Incoming Webhooks, which trigger execution of a new Run in JFrog Pipelines at the very last step of the CI in Jenkins, by sending a webhook request to JFrog Pipelines when the Docker image and build info is deployed in Artifactory.
Advantages:
- Reduce the need to handle Helm & Google Cloud SDK Installations, which leads to a faster execution of the deployment.
- Avoid Jenkins sprawl and “plugin hell” based on Kubernetes Plugins, and use JFrog Pipelines native steps instead to deploy to Kubernetes.
- Native Integration with Artifactory to pull and manage Helm Charts.
After the Jenkins build has completed, JFrog Pipelines can manage the deployment of the chart to the k8s cluster.
This can be done with the HelmDeploy native step in JFrog Pipelines, a pre-packaged declarative step with no Helm scripting required.
Let’s remember that our cluster is running on Google Kubernetes Engine. Therefore Google Cloud Integration was added to allow the deployment step:
Code sample (Jenkinsfile & pipelines.yml) is available here.
2. Jenkins Integration with JFrog Pipelines – Migration in parts is the way to go
Re-writing your entire CI/CD from scratch does not really make sense. All the hard work you have done so far using Jenkins is valuable. With our Jenkins Integration you have full flexibility with the specific part that will be migrated. You can even opt to integrate with Jenkins without migrating any current workload away from Jenkins, but focus all future workloads on JFrog Pipelines. For the purpose of this discussion, we’ll assume that you want to migrate part of your workload.
Let’s say, for example, that you are highly invested in your CD process and you want to keep the current implementation in Jenkins and migrate only the CI part to benefit from the advantages of JFrog Pipelines.
Advantages:
- Native integration of JFrog Pipelines with Artifactory.
- Dockerize your application easily by fetching the most updated piece of software from Artifactory using the JFrog CLI/FileSpec.
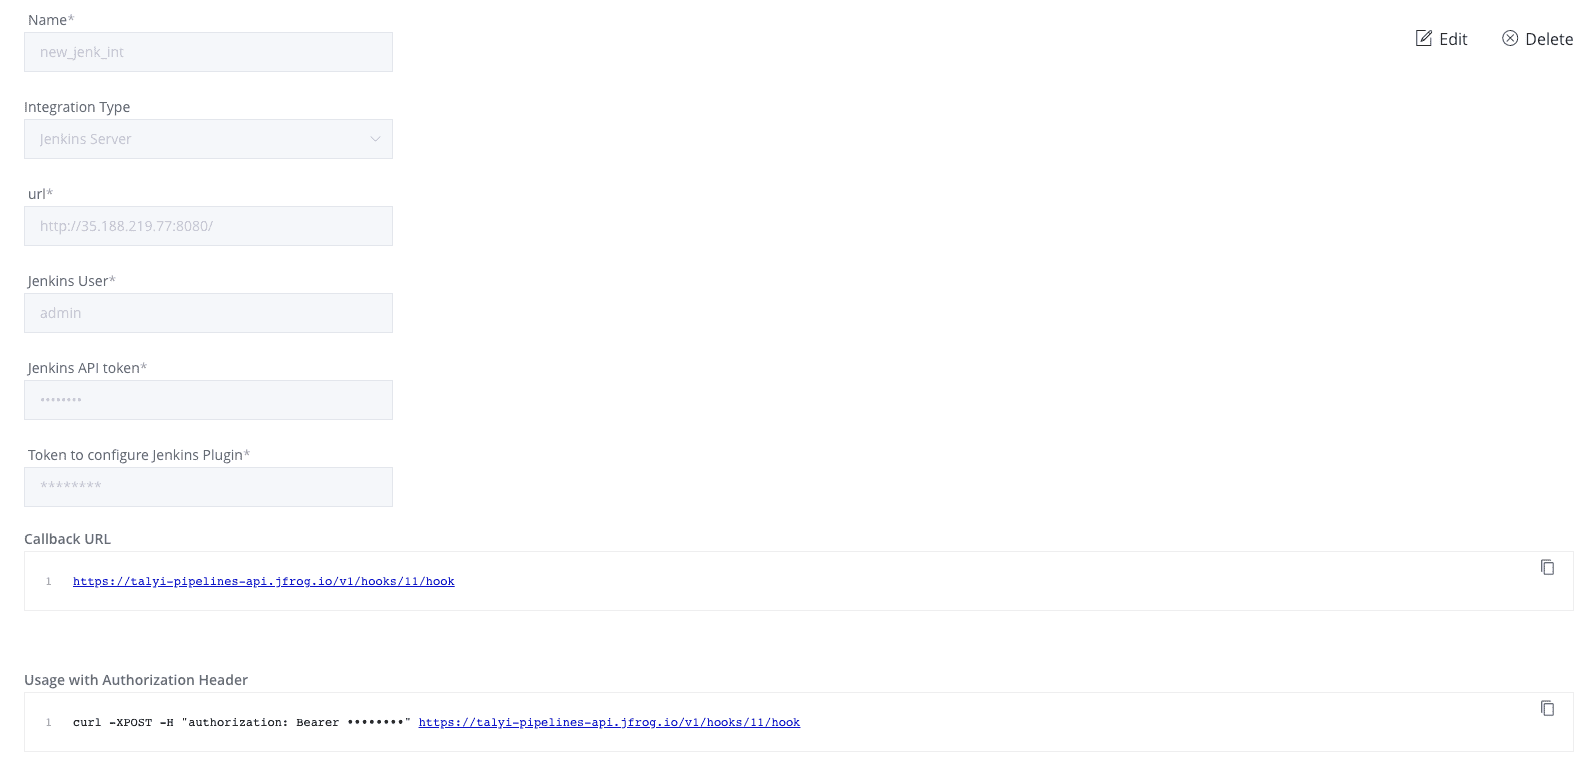
Create a new Jenkins Integration on JFrog Pipelines:
Jenkins username, API Token and URL will be used for communication by JFrog Pipelines, and the Callback URL will be used by Jenkins.
The configuration in Jenkins will look like the following:
“Test Connection” validates that communication is achievable from the Jenkins side as well, based on the Integration URL that was created on the Pipelines side.
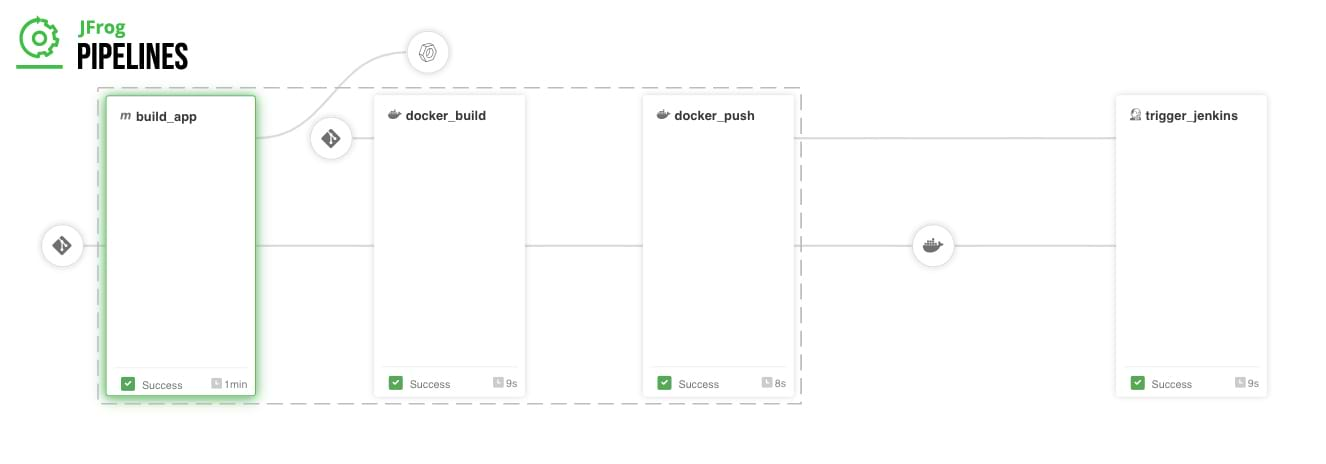
The CI then, can be executed in JFrog Pipelines:
The last step will trigger a new deployment (the CD) which is implemented the same way in Jenkins:
In Jenkins, the last step reports back that the deployment was successfully completed.
Code sample (Jenkinsfile & pipelines.yml) is available here.
3. Helm CI/CD – Add more automations for streamlining your processes
Helm is a package manager for Kubernetes. Helm deploys charts that define the packaged application. It is a collection of all your versioned, pre-configured application resources which can be deployed as one unit.
We frequently change the way we deploy our software and these changes are reflected in different Helm chart versions, which can all be stored in Artifactory using Helm chart repositories.
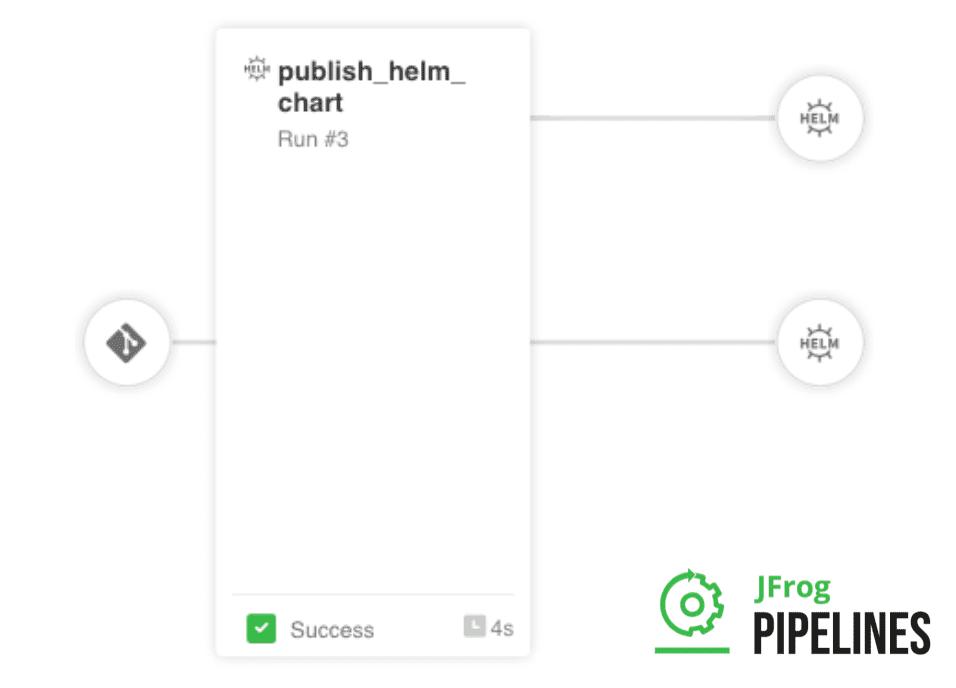
With JFrog Pipelines, you can automate the process of deploying new Helm charts to Artifactory, using the HelmPublish native step.
Advantages:
- Packaging the chart is done without coding using Helm, but with a natively written step, which also examines the chart for possible issues (lint: true).
- Reduces the need to handle Helm installations (and version can be chosen based on needs v2/v3).
Updating an existing Pipeline Resource immediately triggers other pipelines that have this resource as an input.
Code sample (pipelines.yml) is available here.
In this blog post we’ve discovered three different ways to leap forward with JFrog Pipelines as part of your existing Jenkins based DevOps processes. Hopefully this will encourage you to consider using multiple approaches alongside one another.
See how JFrog Pipelines can work for you, try it out for yourself >


